Operation 1
This operation will be defined as a closed route in figure of 8. It is a simple and basic mission that will serve as an example to learn how to use the Veronte Ops application.
Mission
Once the desired location for the mission has been selected, there are two ways to create an 8 figure route:
Generate route option.
Segments option.
Generate route
This option allows to create missions with predefined routes: ![]() Spiral,
Spiral, ![]() Photogrammetry and
Photogrammetry and ![]() Figure.
Figure.
Follow the steps below to define the mission using the Generate route option:
Go to Mission Toolbar \(\rightarrow\) Generate route \(\rightarrow\) Create figure.
Click and drag to create the figure in the desired location.
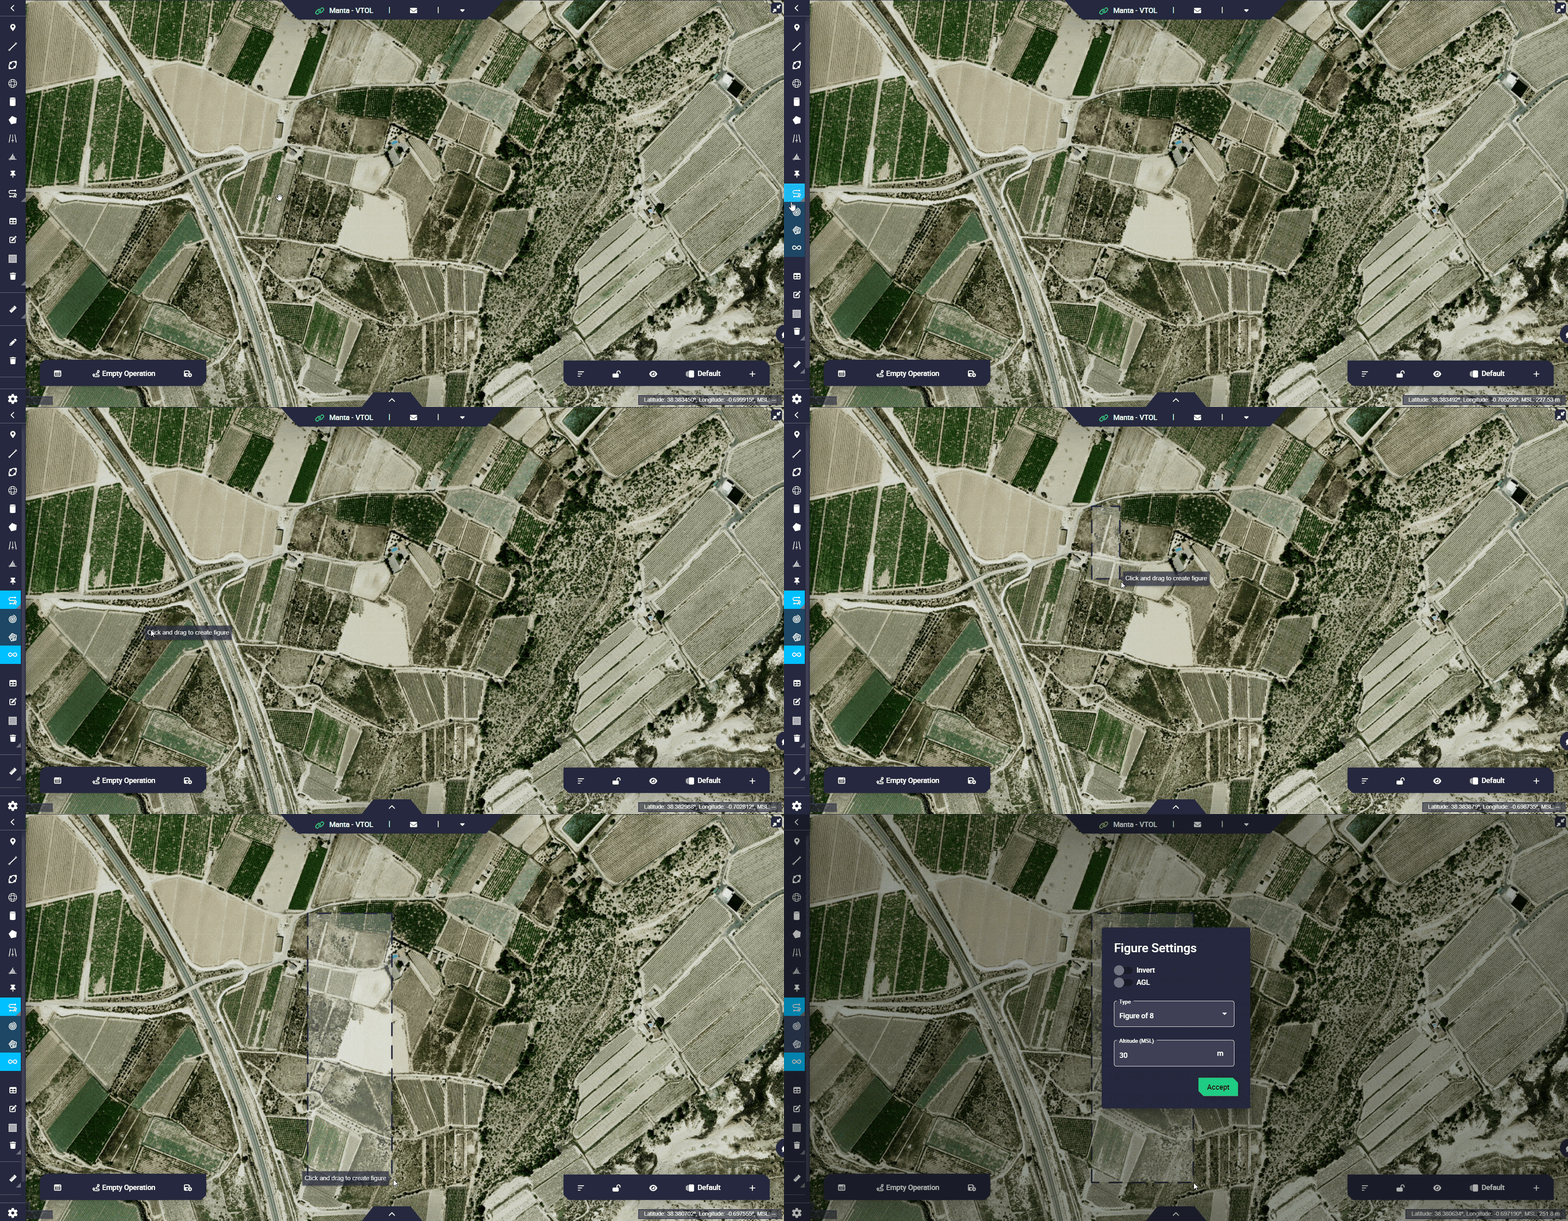
Operation 1 - Create Figure
Configure the Figure Settings.
For more information on the parameters to be configured, visit the Generate route - Operation section of the Veronte Ops user manual.
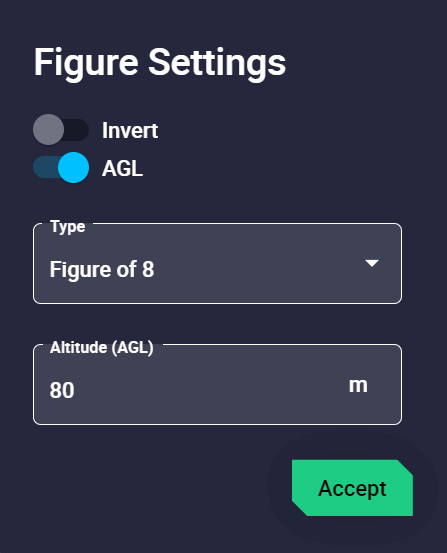
Operation 1 - Figure Settings
Use the Edit Mission option
 in the Mission Toolbar if the user wants to edit the location of a waypoint or the curvature of the route.
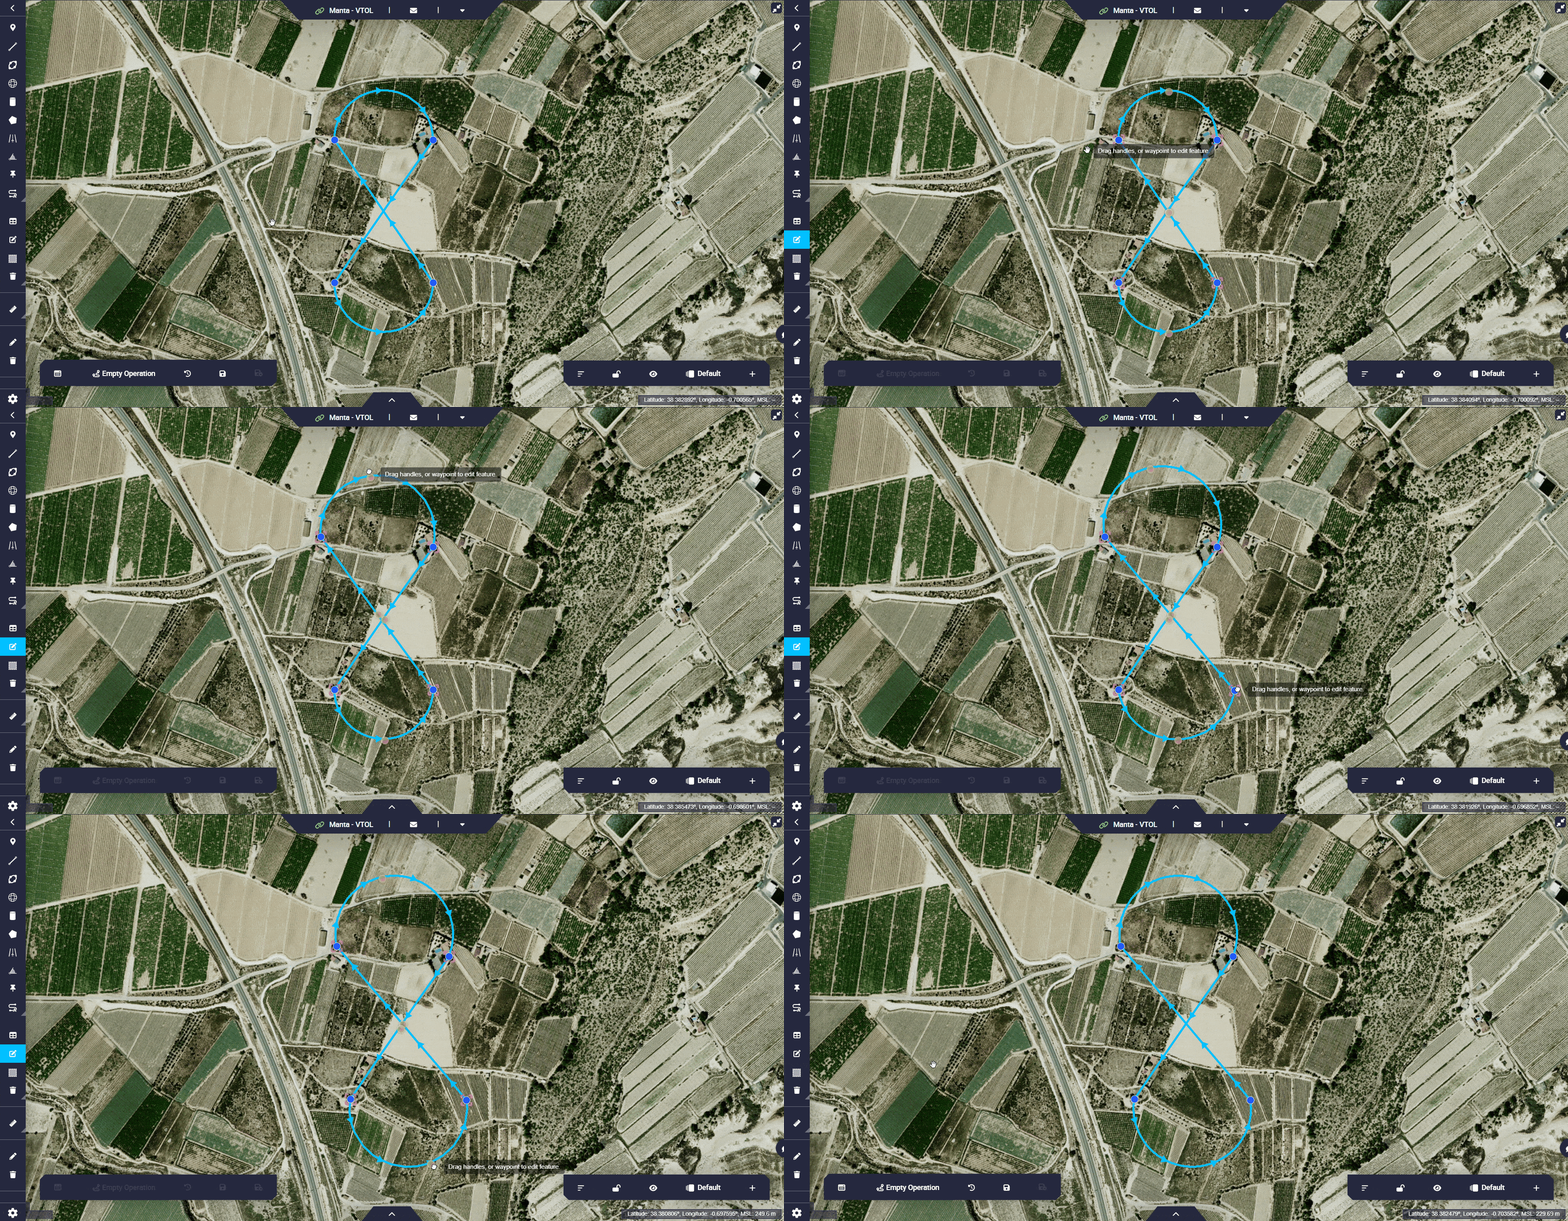
Operation 1 - Edit Mission
Segments
This option allows the user to define the location and altitude of each waypoint, thus defining the mission in more detail.
Follow the steps below to define the mission using Segments.
Go to Mission Toolbar \(\rightarrow\) Segment.
Set as many segments as wished. These segments, separated by waypoints, will draw the mission.
Hint
Set the segments following the desired direction of the route.
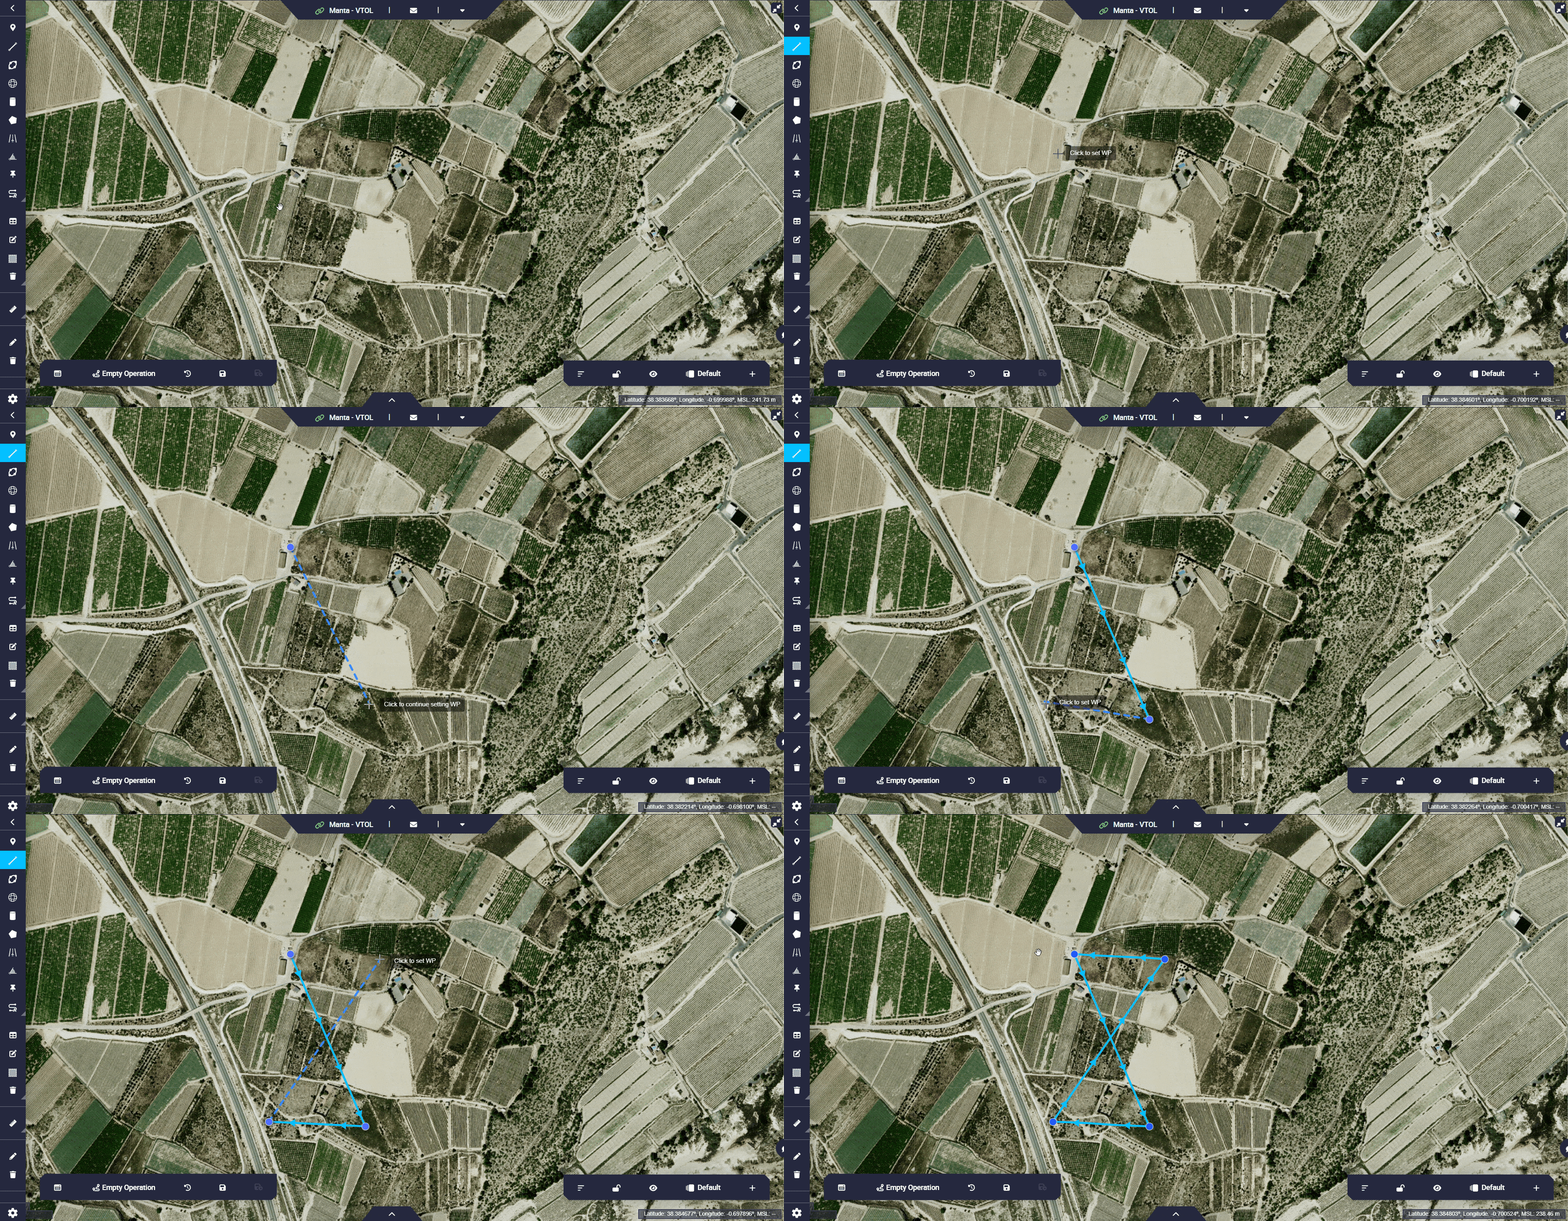
Operation 1 - Segment
Use the Edit Mission option
 in the Mission Toolbar if the user wants to edit the location of a waypoint and the curvature of the route.
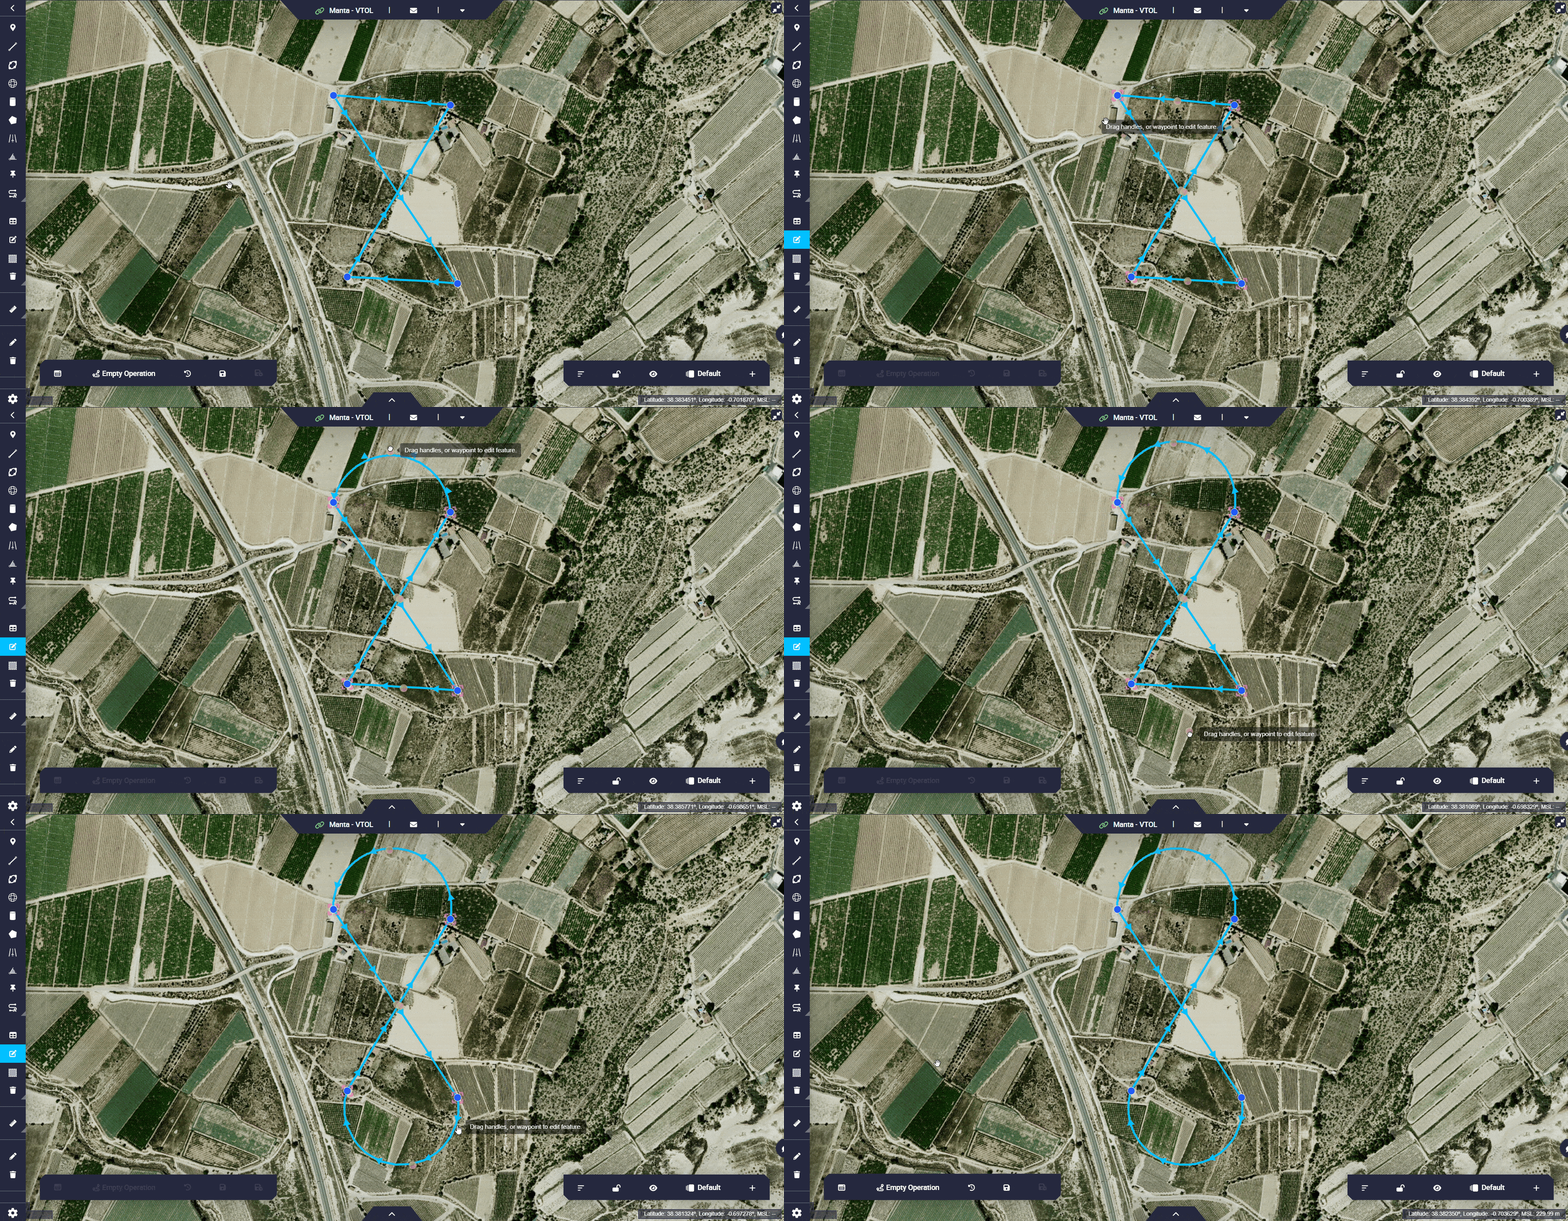
Operation 1 - Edit Mission
Check the altitude of the route waypoints with respect to the ground, to make sure that the route is feasible, i.e. does not interfere with the terrain.
To do this, right-click on any waypoint of the route \(\rightarrow\) Open elevations.
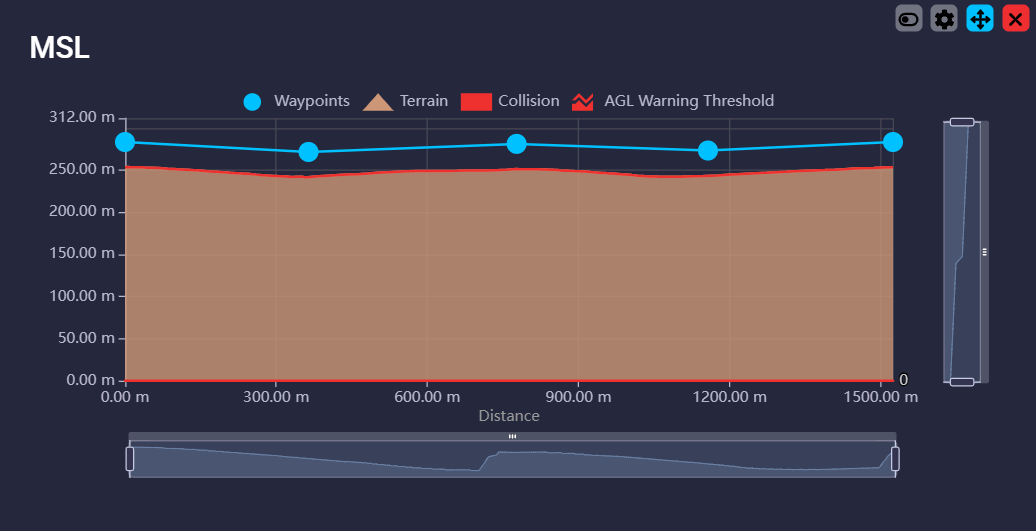
Operation 1 - Elevations panel
Configure the settings for each waypoint to define its altitude and location.
To do this, right-click on a waypoint \(\rightarrow\) Waypoints Settings.
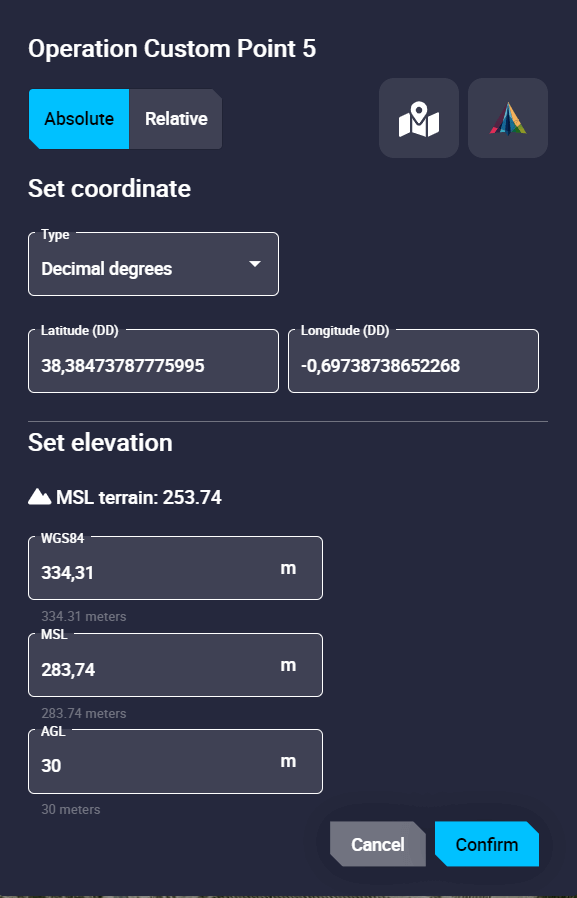
Operation 1 - Waypoints Settings
For more information on the parameters to be configured, visit the Waypoint - Operation section of the Veronte Ops user manual.
Start Route
The user must define a waypoint as the start of the route. This will be the point where the aircraft will start the Cruise phase.
Important
If this point is not defined, Veronte Ops will not allow the operation to be saved.
To define a waypoint as the start of the route, right click on the desired waypoint to be the start of the route \(\rightarrow\) Select the Set Start Route option:
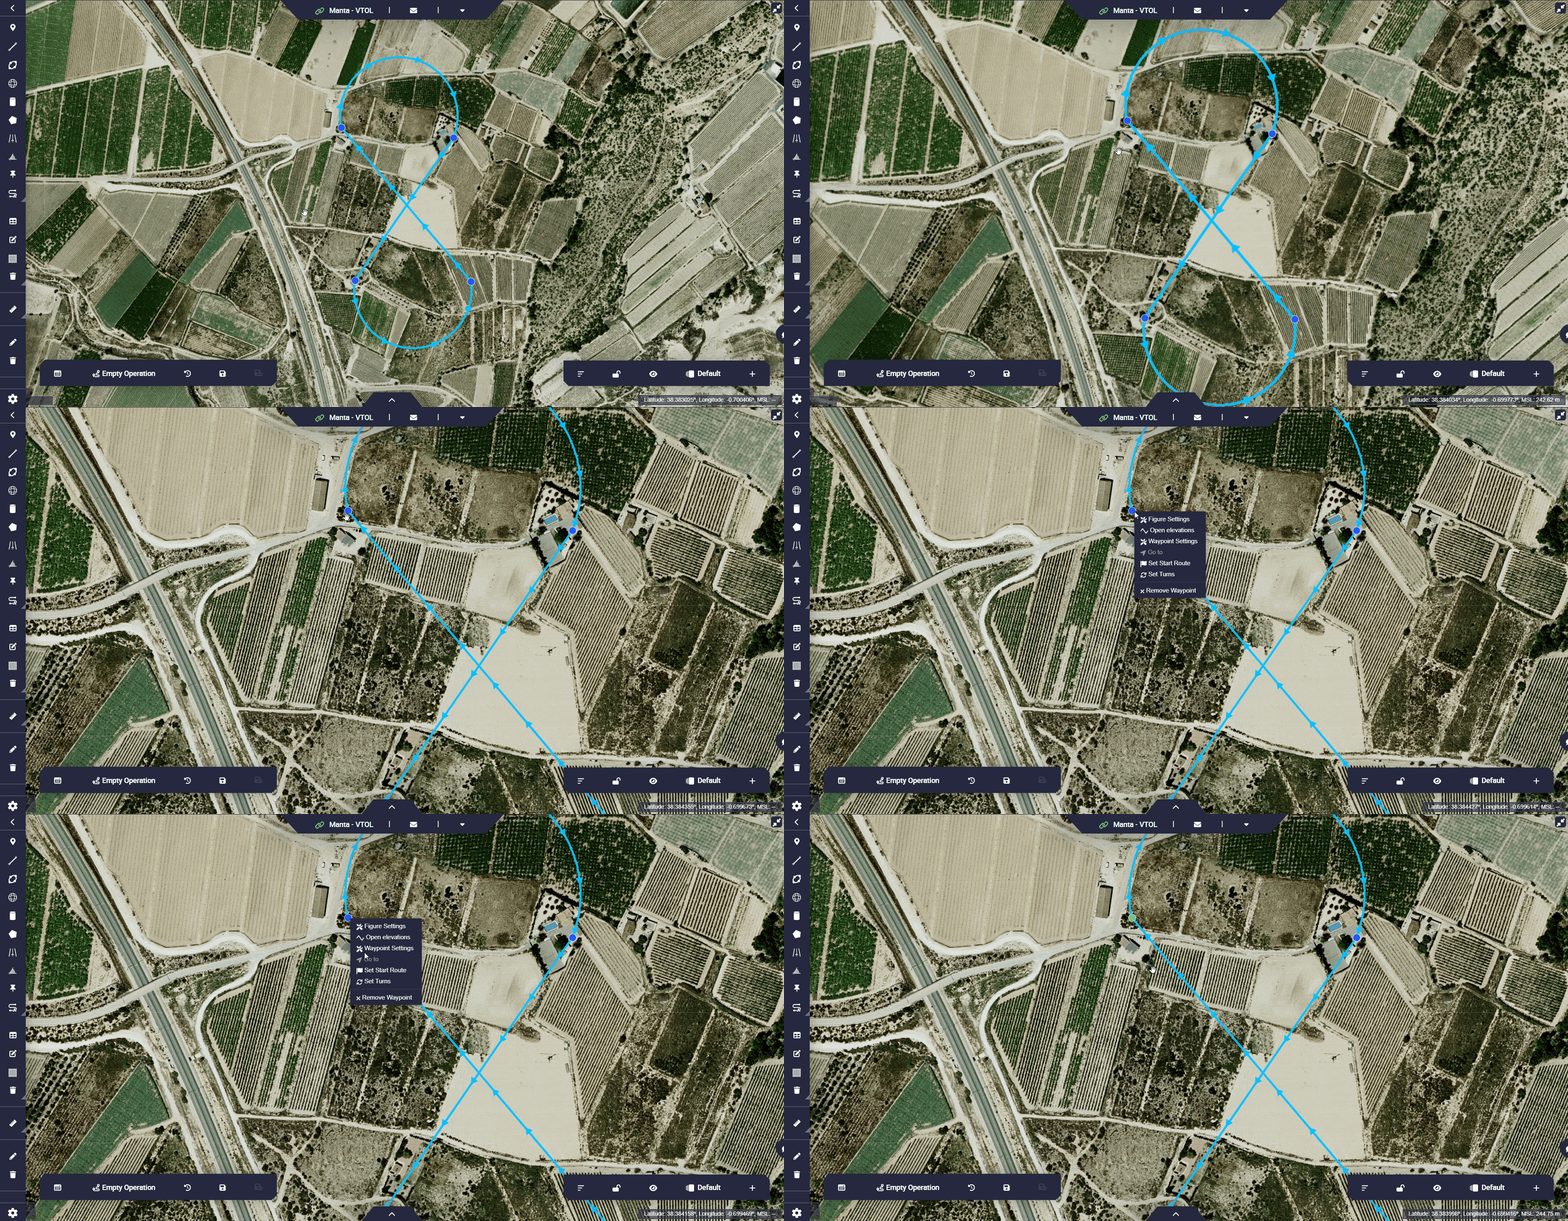
Operation 1 - Start Route
Runway
For the operation of the Embention VTOL aircraft it is necessary to define a runway since in the Approach phase a route will be generated to guide the aircraft to fly to it.
Follow the steps below to define a runway:
Go to Mission Toolbar \(\rightarrow\) Set a Runway.
Click on the map to define the start point of the runway \(\rightarrow\) Click on a second point to define the end of the runway.
Use the Edit Mission option
 to locate the Loiter point where the user wants it to be.
This will be the point around which the Loiter will take place.
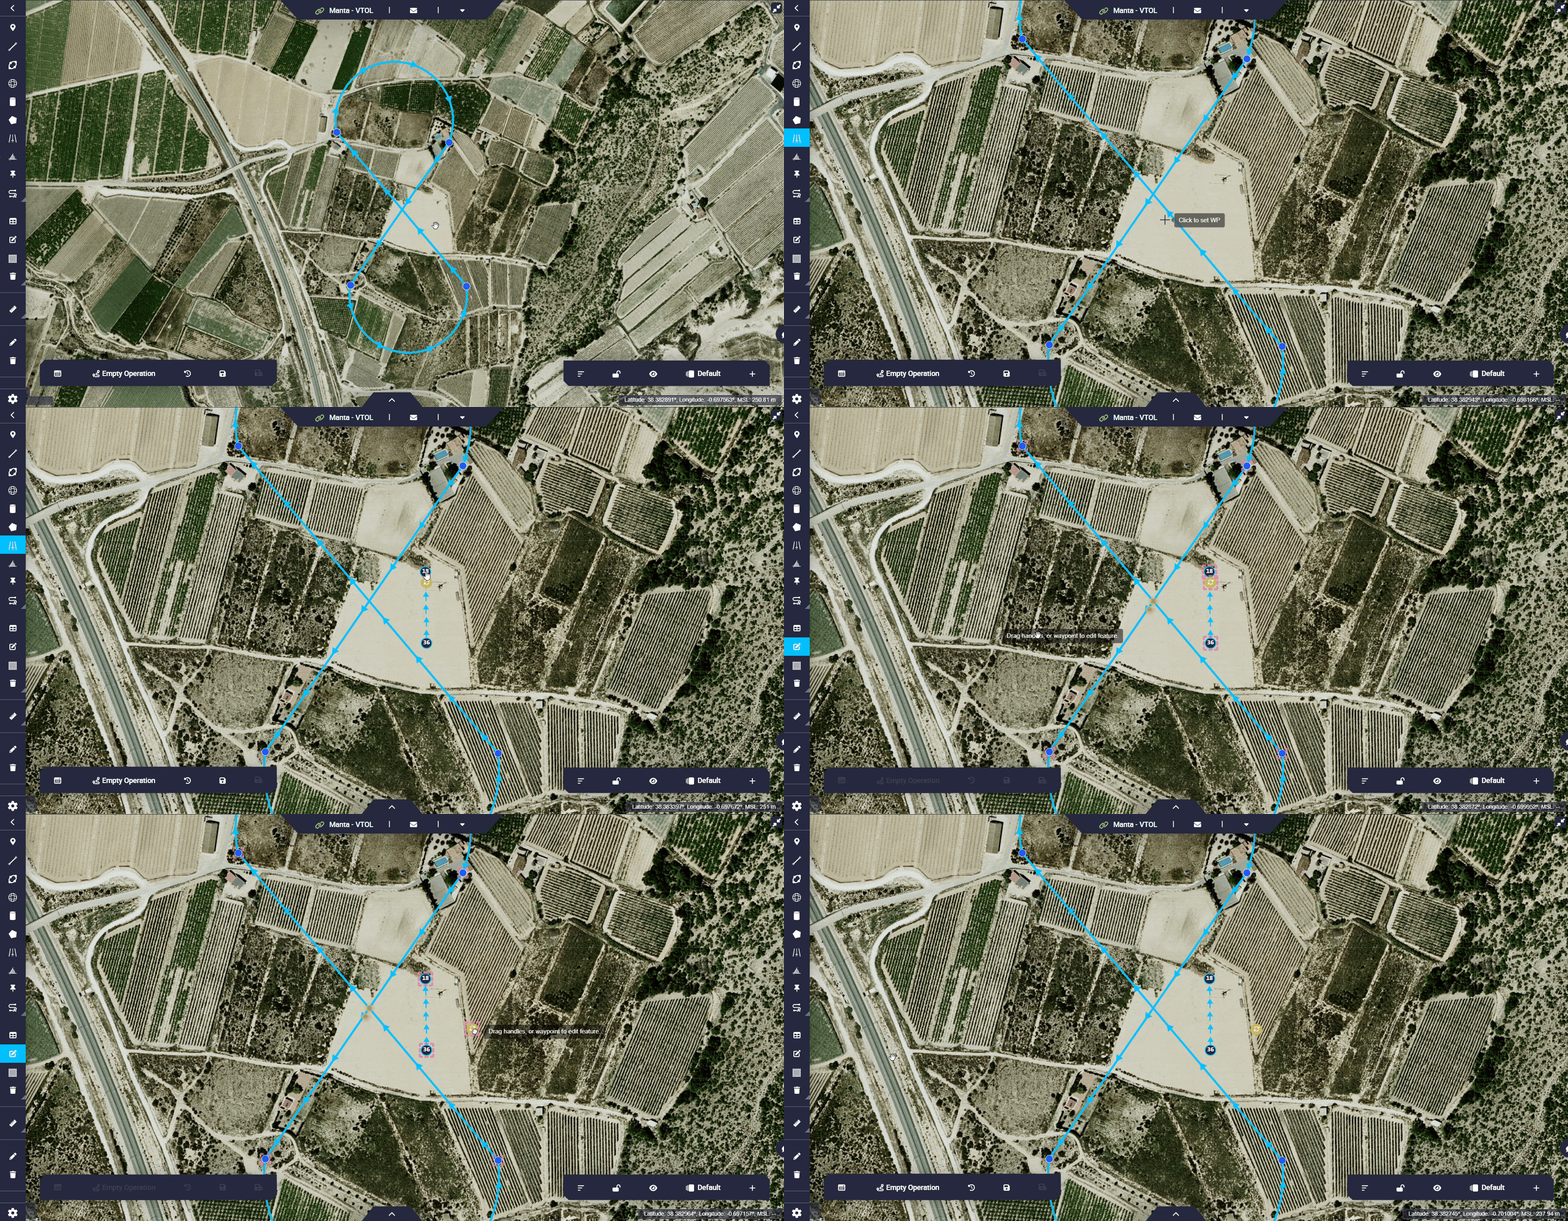
Operation 1 - Runway
Go to Operation Panel \(\rightarrow\) Customize \(\rightarrow\) Runway.
Link the runway defined in the 1x PDI Builder configuration with the just created runway.
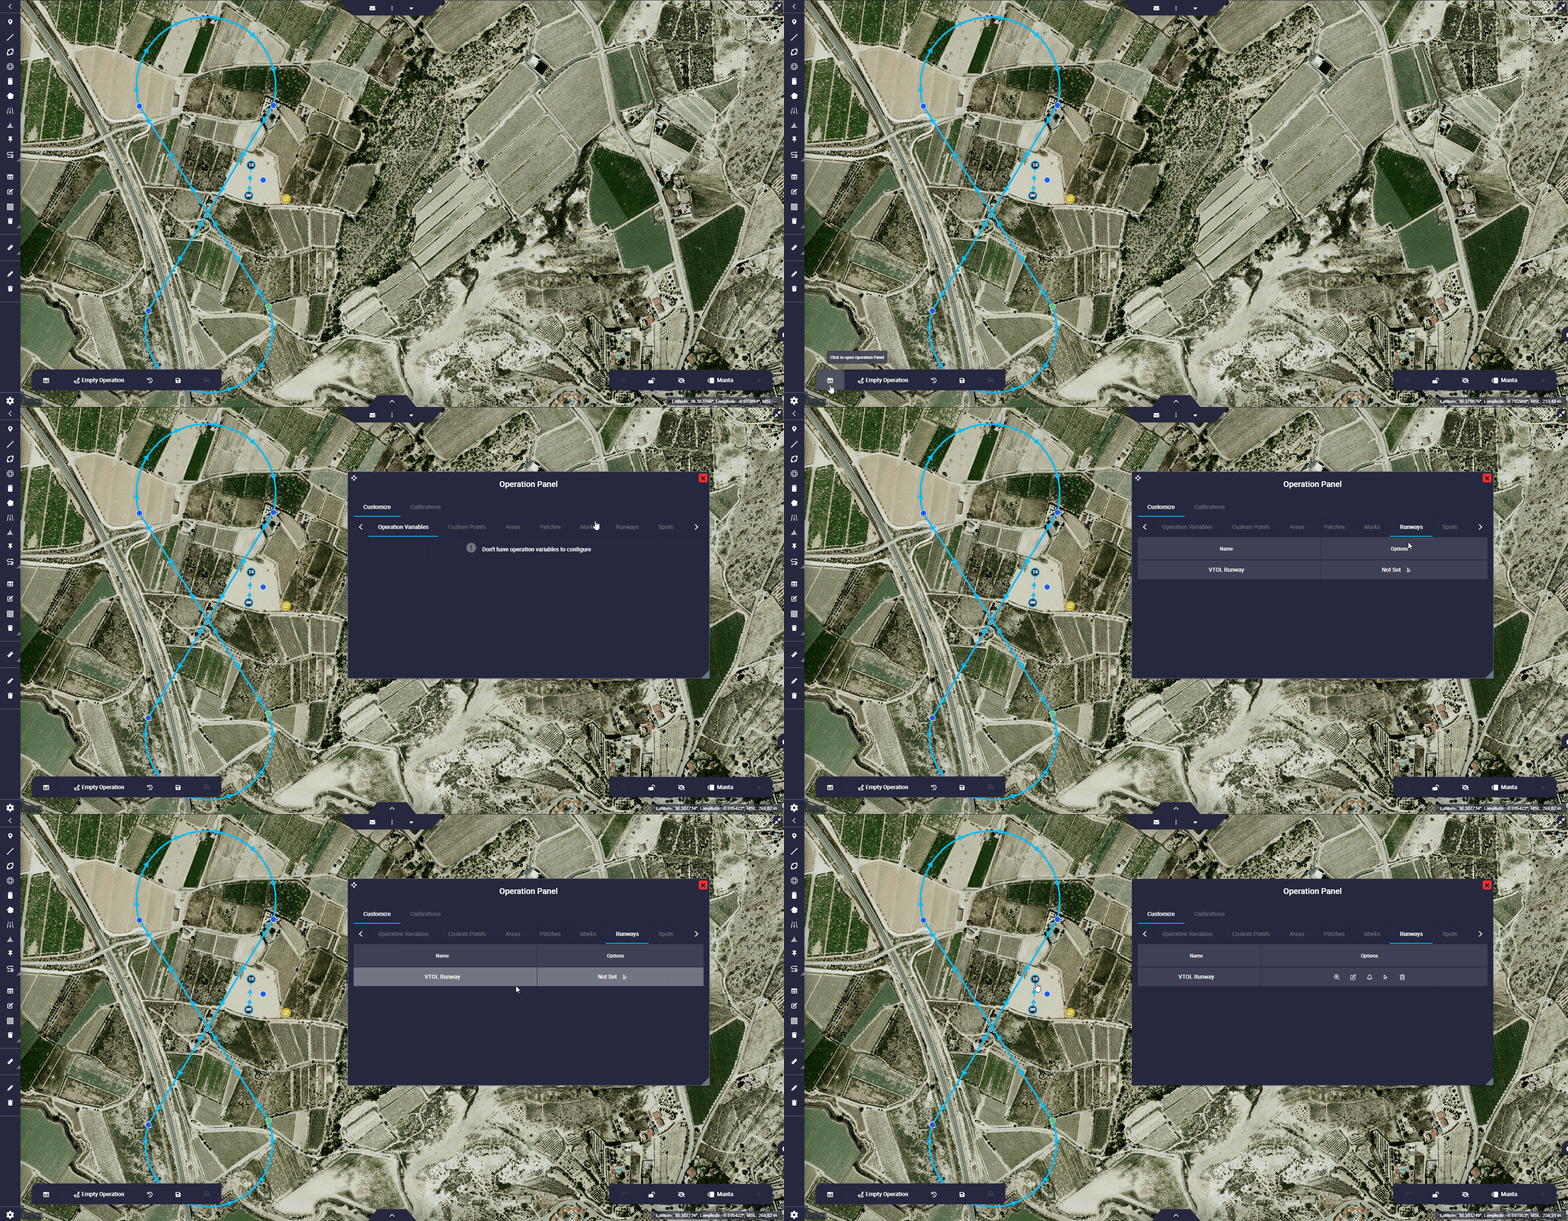
Operation 1 - Set runway
Note
Adjust the runway parameters so that the aircraft performs the desired operation.
For more information on the parameters to be configured, visit the Runway - Operation section of the Veronte Ops user manual.
Home Point
The Home point will be the point used to execute the Compute RTH program of the 1x PDI Builder configuration. This will be the point to which the Autopilot 1x will guide the aircraft in the Return to Home phase.
Follow the steps below to define a waypoint as Home point:
Go to Mission Toolbar \(\rightarrow\) Waypoint.
Click on the map to set a waypoint.
Note
The user also has the option to use an existing waypoint.
Go to Operation Panel \(\rightarrow\) Customize \(\rightarrow\) Custom Points.
Link the Home point defined in the 1x PDI Builder configuration with the desired waypoint.
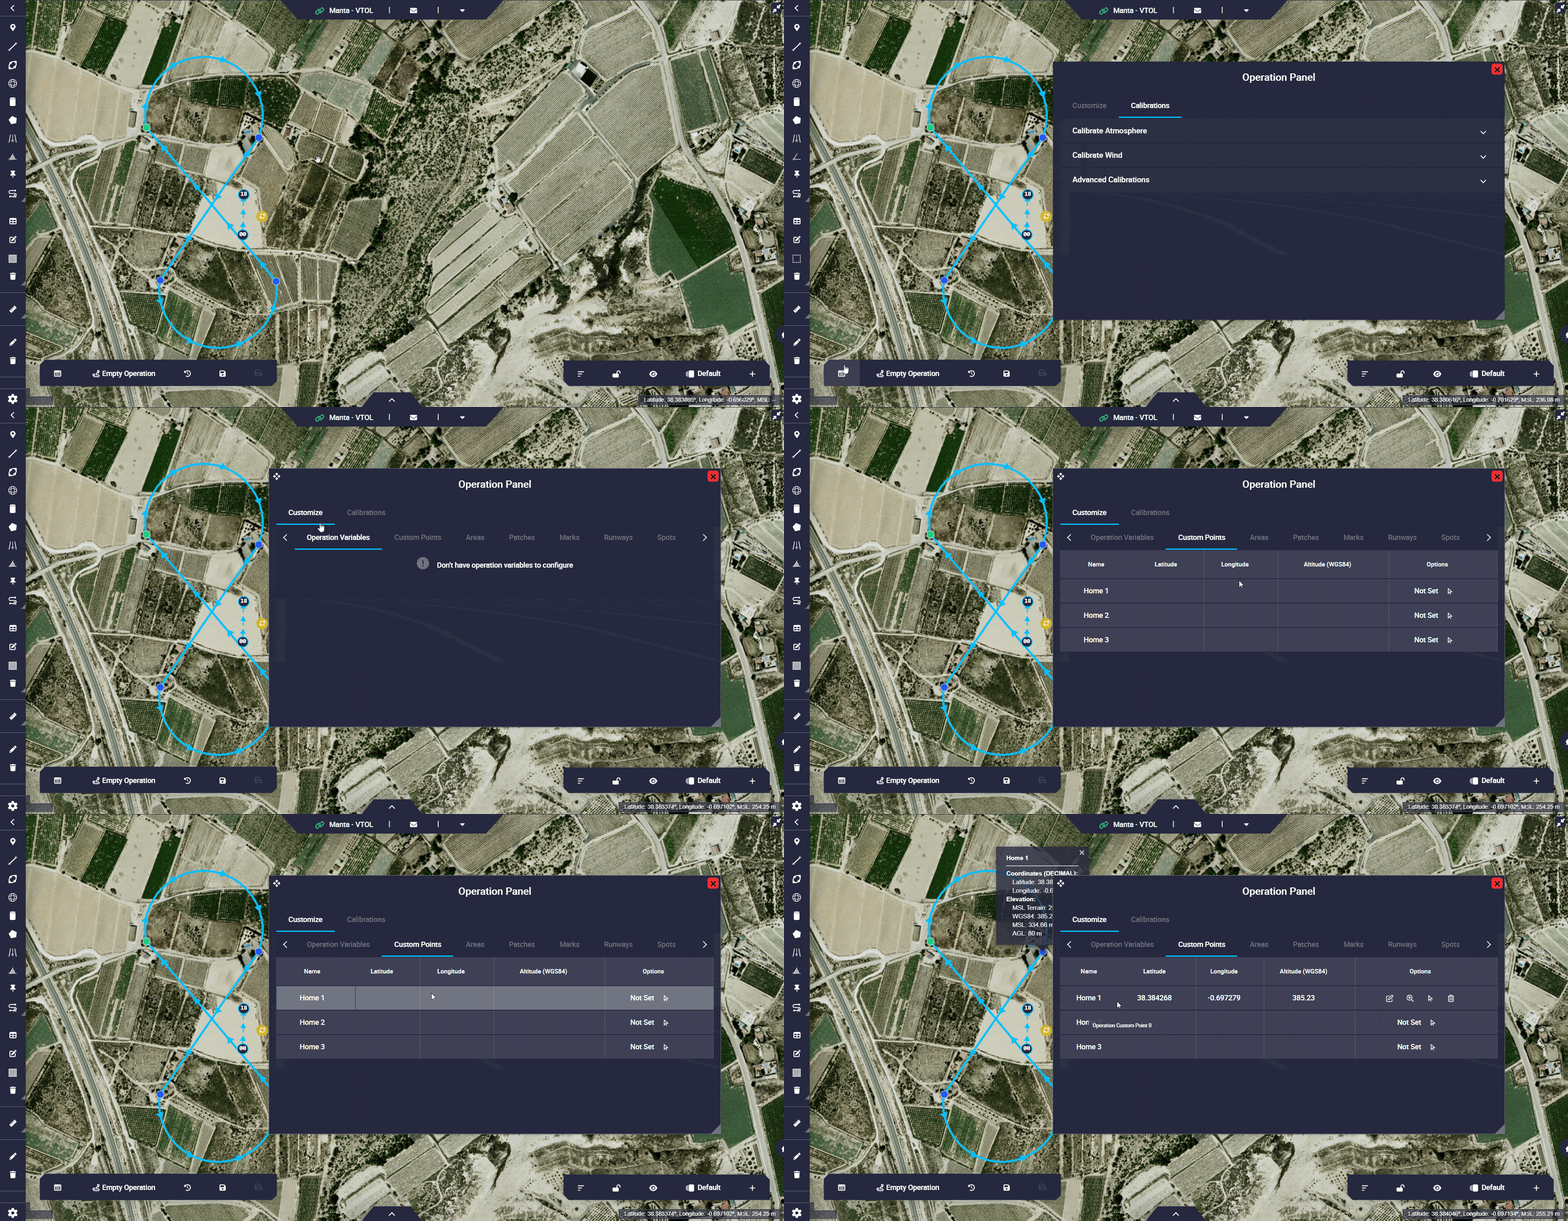
Operation 1 - Home Point
Note
If the user does not define this point, Autopilot 1x will guide the aircraft to the take-off point in the Return Home phase.
